Why DIY Garden Shed Kits Are Your Path to Backyard Freedom
DIY garden shed kits offer a practical way to build quality outdoor storage while saving on installation costs. These kits provide pre-cut materials and step-by-step instructions, letting you create a functional workshop, a cozy backyard retreat, or a well-organized garden space without hiring a contractor.
Key Benefits of DIY Garden Shed Kits:
- Cost savings – Eliminate installation fees while using premium materials.
- Flexibility – Build on your schedule, at your own pace.
- Customization – Choose styles, sizes, and features that match your needs.
- Quality materials – Get the same durable components used in professionally built sheds.
- Personal satisfaction – Experience the pride of building something with your own hands.
Our DIY kits are ideal for semi-professional builders and hands-on DIYers. While the materials are precision-cut, these are not beginner projects. You’ll need some construction experience, the right tools, and at least one helper. As one shed professional notes, “Construction experience is highly recommended due to the complexity and physical nature of assembly.”
At Wright’s Shed Co., we specialize in custom onsite-built structures, but we also offer DIY garden shed kits for capable builders who want our quality materials with the satisfaction of self-assembly. With clear instructions and local support, you’re not just building a shed, you’re creating a personalized sanctuary.
Are DIY Garden Shed Kits from Wright’s Shed Co. Right for You?
A DIY garden shed kit can be a great choice, but is it right for you? At Wright’s Shed Co., we’ve built custom sheds on-site across Utah, Idaho, Iowa, and Nebraska since 1997. We also know some people love the hands-on challenge of building, and that’s who our DIY kits are for. The decision comes down to cost savings versus time investment, your skill level, and the support you need.
Choosing a DIY kit means trading professional installation for savings on labor. You get the same high-quality materials we use in our onsite builds, but you provide the sweat equity. For someone with construction experience, this is incredibly rewarding. But if your weekends are packed or you’re not confident with power tools, our onsite-built sheds, which include our comprehensive warranty, might be a better fit.
Here’s how the two options compare:
| Feature | Wright’s DIY Shed Kit | Wright’s Onsite Built Shed |
|---|---|---|
| Cost | Lower upfront cost, you save on installation fees | Higher upfront cost, includes professional installation |
| Time | Requires your personal time over multiple weekends | Built by our crew in days, no time investment from you |
| Skill | Best for hands-on DIYers and semi-professional builders | No construction skills needed on your end |
| Warranty | The DIY kits come with no warranty. | Limited structural warranty ranging from 5 to 8 years on buildings and 2 years on doors, along with factory-backed warranties from LP SmartSide (5/50 years) and GAF shingles (lifetime). |
| Customization | Choose styles, sizes, and add-ons; finish it your way | Full custom design with professional finishing touches |
| Materials | Same precision-cut, premium components we use | Same high-quality, durable materials |
The True Cost of a DIY Garden Shed Kit
When you’re calculating what a DIY garden shed kit will actually cost, the kit price is just your starting point. While you save on installation, you’ll need to budget for tools, fasteners (nails and screws), caulk, and paint or stain.
Our kits are very complete, including precision-cut lumber, floor systems, pre-assembled wall panels, pre-built trusses, doors with hardware, roof sheeting, shingles, drip edge, and underlayment. However, think of it like a meal kit, we provide the premium ingredients, but you need the pans and oven.
If you don’t own tools like a nail gun or circular saw, factor in purchase or rental costs. You’ll also need to prepare the foundation, whether it’s a concrete slab or gravel pad. We don’t build foundations, but we’re happy to provide expert guidance.
Also, be honest about the value of your time. For some, the time spent building is part of the joy; for others, it’s a cost that favors professional installation.
Assessing Your DIY Skill Level
Let’s be candid: building a DIY garden shed kit is a real construction project, not like assembling furniture. It requires building skills, physical stamina, and problem-solving. Our kits are best for hands-on DIYers or semi-professional builders who have experience with projects like building a deck or framing. You should be comfortable reading construction plans and using power tools like circular saws and nail guns.
The work is physically demanding, and you will need help. We recommend a minimum of 2 people for assembly, especially for raising walls. For larger sheds, 3-4 people makes the job safer and more manageable. If your experience is limited to minor home repairs, our onsite-built option is likely a better choice. You’ll get a perfect result without the frustration, backed by our full warranty.
Wright’s Shed Co. DIY Garden Shed Kits
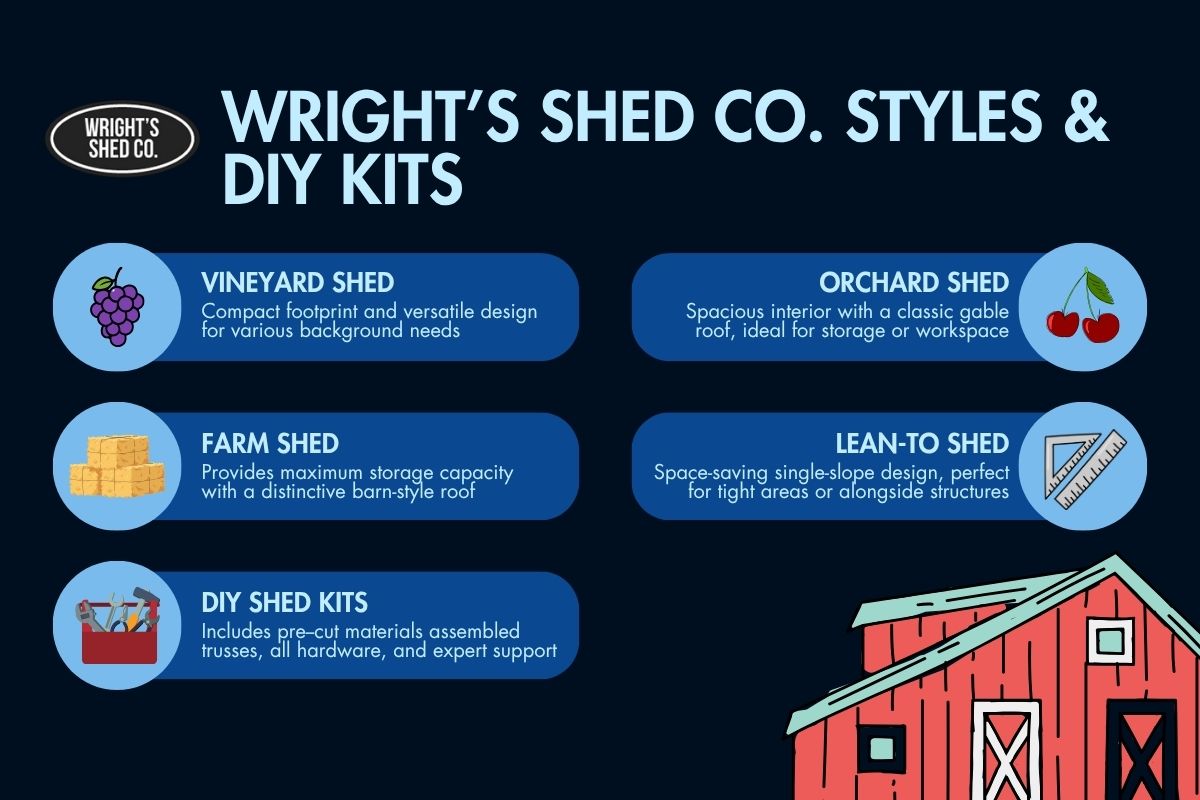
Choosing the right shed kit starts with understanding your space, storage needs, and style preferences. At Wright’s Shed Co., our DIY garden shed kits are thoughtfully designed to suit every homeowner – from weekend gardeners to DIY enthusiasts who want something built to last. Each style offers its own unique features, making it easy to find the perfect match for your backyard.
Vineyard Shed
Compact and versatile, the Vineyard shed is perfect for storing tools, gardening supplies, or creating a cozy workspace. It’s a functional yet charming option that fits beautifully into smaller yards.
Orchard Shed
Spacious and timeless, the Orchard shed features a classic gable roof and sturdy design. It’s ideal for homeowners who want extra storage or a small workshop that complements their outdoor space.
Farm Shed
Built for strength and capacity, the Farm shed’s barn-style roof allows for maximum storage space. It’s a great choice for larger tools, equipment, or even recreational vehicles.
Lean-To Shed
Designed for efficiency, the Lean-To shed’s single-slope structure fits neatly beside homes or fences. It’s perfect when you need extra storage without giving up much yard space.
DIY Shed Kits
Every kit comes complete with pre-cut materials, assembled trusses, all required hardware, and expert support. Whether you’re new to building or an experienced DIYer, our kits make it simple to create a shed that’s durable, attractive, and built just the way you want.
What to Expect: Unboxing Your Wright’s DIY Garden Shed Kit
The arrival of your DIY garden shed kit marks the start of your hands-on project. Inside a Wright’s Shed Co. kit, you’ll find precision-cut lumber and pre-assembled components like wall panels and trusses, designed to save you time. We’ve designed our kits to be among the most complete in the industry, with materials often marked to match the assembly instructions.
A key benefit of choosing Wright’s Shed Co. is our local customer support. Our team knows these kits inside and out because we use the same materials in our onsite builds. If you hit a snag, we’re just a phone call away.
What’s Typically Included in the Box
Your Wright’s DIY garden shed kit is a comprehensive package designed to streamline your build. We do the cutting and measuring so you can focus on assembly.
Your kit includes:
- Pre-Built and Pre-Sheeted 2×4 Walls with LP SmartSide Paneling
- Pre-Cut 2×6 Pressure Treated Wood Base
- Pre-Cut 3/4″ Tongue and Groove OSB Floor Sheathing
- Pre-Built Roof Trusses Joined Together with Steel Plates
- Diamond Plate Metal Door Threshold
Tools and Materials You’ll Need to Supply
While our DIY garden shed kits are comprehensive, you’ll need some tools and materials. Having these ready will prevent delays.
Essential tools include:
- Framing hammer, tape measure, level, circular saw, and power drill
- Utility knife and caulk gun for precision and sealing
- Safety gear: safety glasses, work gloves, and sturdy footwear
- Optional for efficiency: framing nail gun and roofing nail gun with an air compressor (available for rent)
You will also need to supply fasteners. We recommend galvanized nails for rust resistance: 10d-16d framing nails for framing and 8d galvanized ring shank nails for siding, trim, and sheeting. Finally, you’ll need caulk or sealant for weatherproofing and your choice of paint or stain to finish and protect your shed’s exterior.
The 5 Key Steps to Assembling Your Wright’s DIY Garden Shed Kit
Building your DIY garden shed kit is a rewarding project that we’ve broken down into five manageable steps. Every kit comes with detailed instructions, but the general flow is always foundation, floor, walls, roof, and finishing touches.
This is a team effort. We strongly recommend at least two people for assembly, especially for handling heavy wall panels and floor sections. For larger sheds, three or four helpers make the job safer and more enjoyable.
Step 1: Site Preparation and Foundation
A proper foundation is essential for your shed’s longevity. An unlevel base can cause structural problems over time, like doors that won’t close properly. While Wright’s Shed Co. doesn’t build foundations, we provide expert advice on the best option for you, whether it’s a compacted gravel pad, a concrete slab, or treated wood skids.
Before you start, check your local building codes and permit requirements (see an overview of building permits), as they vary by location. Also, ensure the site has good drainage to protect your foundation.
Step 2: Building the Floor and Walls
With the foundation ready, you can start building. Begin with the floor system. Lay out the pre-cut joists to form a square and level frame, then attach the floor sheeting. This creates a solid platform for the rest of the build.
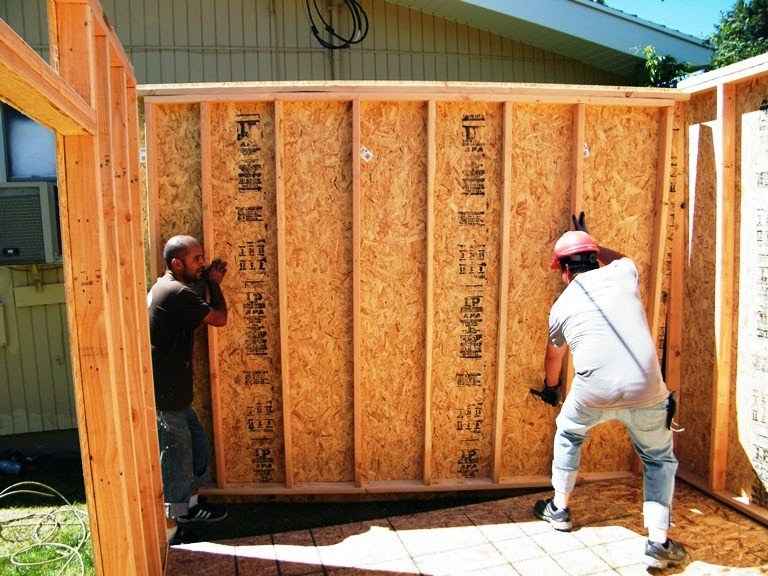
Next, assemble the walls. Our kits feature panelized walls or pre-cut framing, which you’ll construct on the floor. With your helpers, raise each wall section into position, brace it, and fasten it to the floor and adjacent walls. Seeing the walls go up is one of the most exciting moments of the project.
Step 3: Installing the Roof
With the walls up, it’s time to install the roof. Our kits include pre-built trusses, which you and your helpers will lift and set atop the walls according to the instructions. Once the trusses are secured, you’ll attach the pre-cut roof sheeting (plywood or OSB panels).
To weatherproof the structure, roll out the underlayment, install the drip edge to channel water away, and finally, install the shingles. This final layer protects your shed and gives it a finished look.
Step 4: Adding Doors, Windows, and Trim
Now you’ll add the finishing structural elements. Our kits include pre-assembled doors, saving you complex carpentry work. Simply hang the doors in their openings and attach the included hardware. If your kit has windows, install them in their designated openings to bring in natural light.
The final touch is the trim work. Attach the pre-cut corner, fascia, and door/window trim to cover exposed edges and give your shed a clean, professional appearance.
Step 5: Finishing Touches and Customization
The main construction is done! Now it’s time to make the shed your own. The most important step is painting or staining the exterior, which provides essential weather protection and allows you to match your home or garden aesthetic. Inside, the possibilities are endless.
Add shelving for organization, install a workbench for projects, or hang pegboards for tools. You can also add exterior details like flower boxes or decorative shutters. This is your chance to turn your DIY garden shed kit into a space that perfectly fits your needs.
Frequently Asked Questions about DIY Garden Shed Kits
It’s natural to have questions before starting a big project. Here are the most common ones we hear about our DIY garden shed kits.
How long does it take to build a DIY garden shed kit?
Most kits take 1-2 weekends with two capable DIYers. Larger sheds may require additional time depending on complexity and your experience level.
Do I need a permit to build a shed from a kit?
Many areas require permits for structures over 120 sq. ft. Check with your local building authority before starting your project.
What if I run into problems during assembly?
Our kits include detailed instructions and video support. Our local team is available by phone to guide you through any challenges.
What makes Wright’s DIY garden shed kits different?
We use the same premium materials as our professional builds, backed by local expertise, warranties, and ongoing customer support.
Can I customize my DIY garden shed kit?
Yes! Choose from Vineyard, Orchard, Farm, or Lean-To styles, select your size, and add features like extra windows or doors.
Your Perfect Shed: DIY Garden Shed Kits from Wright’s Shed Co.
Building a DIY garden shed kit from Wright’s Shed Co. is a journey that ends with a personalized space you built yourself. The sense of accomplishment from crafting something with your own hands is unparalleled, and you’re left with a structure that will serve your family for decades.
Our kits offer the perfect blend of cost savings and creative control for hands-on DIYers. You get the same high-quality materials we use in our professional builds, including styles like the Vineyard, Orchard, Farm, or Lean-To, while saving on installation costs. You provide the labor, and we provide the support and expertise.
However, the DIY route isn’t for everyone. If you’d prefer a professionally built structure with a comprehensive warranty, our expert crews can build a custom shed, detached garage, or chicken coop right in your backyard. These onsite-built structures come with warranties for complete peace of mind.
Whether you’re ready to tackle a DIY garden shed kit or prefer professional construction, Wright’s Shed Co. is here to help. We’ve been building quality structures since 1997 for homeowners across Utah, Idaho, Iowa, and Nebraska.
Ready to explore all your options? Learn more in our complete shed kit guide.


