Why Your Shed Needs a Ramp
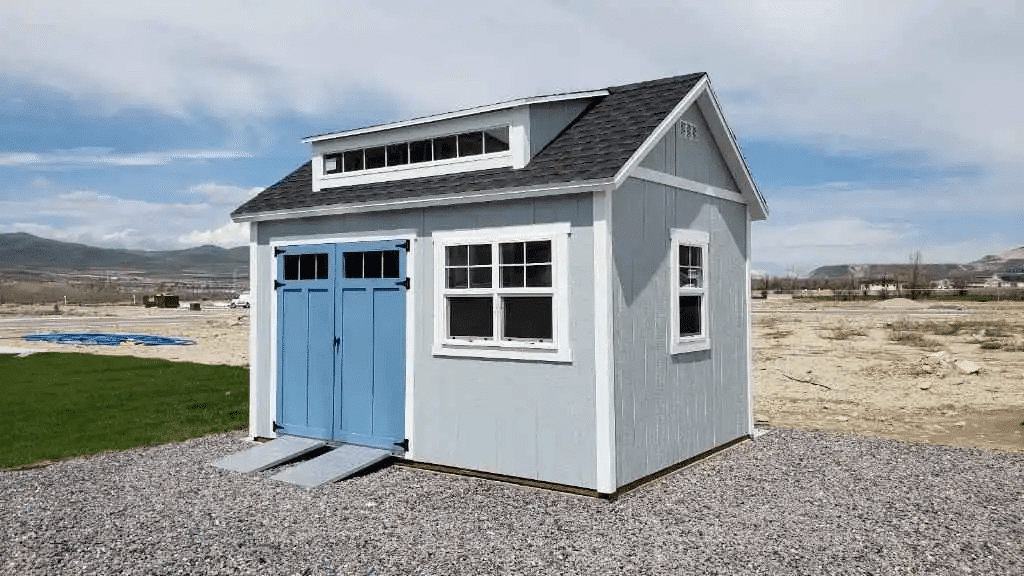
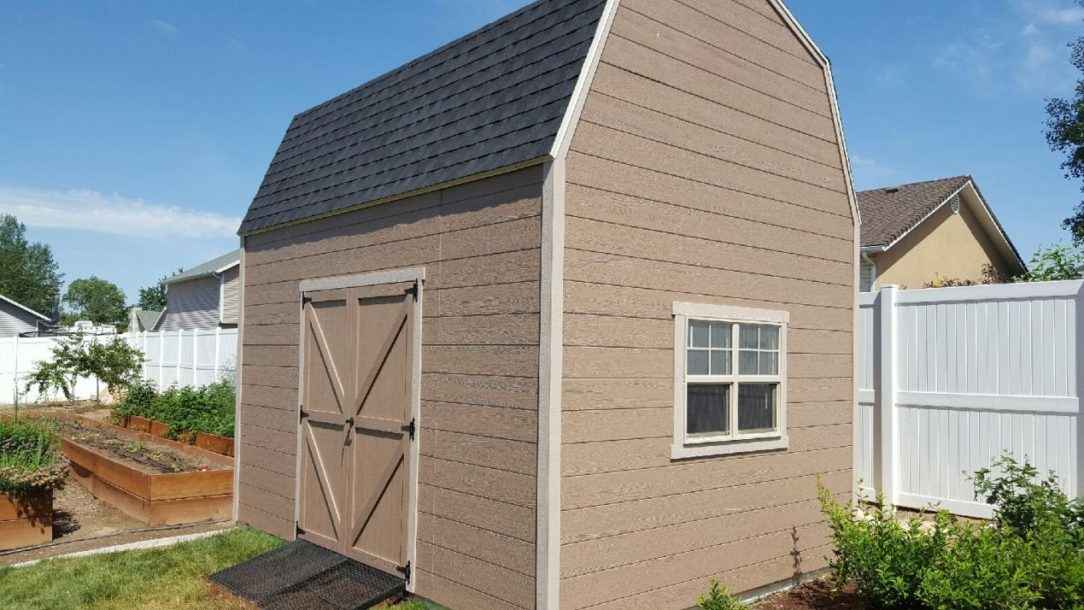
A shed with ramp makes storing heavy equipment like riding mowers and wheelbarrows dramatically easier and safer. Instead of lifting items over a raised threshold, risking injury and damage, a ramp provides smooth, stable access.
Quick Answer: Building a Shed with Ramp
- Plan Your Ramp – Measure shed height, calculate slope (1:4 to 1:8 ratio), choose materials.
- Select Materials – Pressure-treated wood is a durable and popular choice for a custom-built ramp.
- Build the Structure – Attach ledger board to shed, install joists, add decking.
- Consider Load Capacity – Standard ramps handle 1,000-2,500 lbs depending on construction.
- Ensure Safety – Use gradual slopes, non-slip surfaces, and proper anchoring.
The right ramp transforms your shed from a storage hassle into a functional workspace, protecting your equipment, preventing damage to your shed, and eliminating back strain. It’s a feature that protects your investment in both your shed and your tools.
Since 1997, Wrights Shed Co. has built thousands of custom sheds across Utah, Idaho, Nebraska, and Iowa. We’ve learned that a well-designed shed with ramp is one of the most requested features. It’s often the difference between a shed that gets used daily and one that becomes a storage headache. Whether you’re building new or upgrading, the right ramp makes all the difference.

Why a Shed Ramp is an Essential Upgrade
Wrestling a riding mower over your shed’s threshold after a long day of yard work is frustrating and unsafe. A shed with ramp isn’t just a nice-to-have feature, it’s an essential upgrade that transforms how you use your outdoor storage. A ramp creates a smooth transition for anything on wheels, making storage effortless. No more lifting, scraping, or wrestling with a stubborn threshold.
Beyond convenience, a shed with ramp improves safety, protects your equipment from wear, and prevents damage to your shed’s door frame. It’s a simple addition that increases your shed’s functionality while safeguarding your investments.
The Safety Factor: Preventing Strains and Spills
Lifting a 200-pound snowblower over a six-inch step isn’t just difficult, it’s a recipe for back injury. A ramp eliminates this risk by allowing you to roll heavy items up a gentle incline instead of lifting them. This dramatically reduces physical strain, which is especially important when handling heavy equipment like riding mowers or ATVs.
Ramps also remove the tripping hazard of a raised threshold, providing sure footing every time you enter or exit. In our experience building sheds since 1997, a ramp is a top safety request from customers who understand that a gentle, predictable slope is crucial for moving wheeled items safely.
Protecting Your Investment: Sheds and Equipment
Your shed and the equipment inside are significant investments. A ramp protects both from damage. Without one, dragging a mower over the threshold causes wear on the shed’s flooring and door frame, leading to splinters, chips, and costly repairs. This repeated stress can even compromise the doorway’s structural integrity.
Your equipment also suffers from constant bumping and scraping, which damages wheels, knocks axles out of alignment, and scrapes away paint, leading to rust. A ramp is preventative maintenance that protects your investments and pays for itself by avoiding future repair costs. For more insights, check out our guide on Why You Should Consider Adding a Shed Ramp. You can also explore solutions on our Shed Entry Ramp page.
Planning Your Perfect Shed with Ramp
A shed with ramp that works for your needs requires thoughtful preparation. The time spent planning now will save you headaches later. Before you start, consider these key factors:
- Intended Use: What will you roll up the ramp? A push mower has different needs than a 500-pound riding mower or an ATV. This determines the ramp’s required strength and width.
- Weight Capacity: Your ramp must handle the load without flexing or cracking. High-quality ramps can handle 2,500 pounds, while lighter ones manage around 1,000 pounds.
- Shed Door Size: The ramp should be at least as wide as your door for comfortable access. At Wright’s Shed Co., we often build sheds with 5 to 8-foot double doors to accommodate large equipment.
- Ground Conditions: A level or sloped yard affects ramp length and design. Since all our sheds are built onsite, not shipped, we can help you determine the best placement for your shed, which will in turn affect the ramp design.
- Budget: A DIY wooden ramp is an economical choice that allows for full customization.
- Local Building Codes: A quick call to your local building department can clarify if a permit is needed, though most shed ramps don’t require one.
Choosing the Right Ramp Material
The material you choose for your shed with ramp affects cost, durability, and maintenance. For a durable, long-lasting ramp that you can customize to your exact needs, pressure-treated wood is the best option.
- Pressure-Treated Wood: The most popular DIY choice. It’s affordable, easy to work with, and resists rot and insects. You can stain it to match your shed for a seamless look. The downside is it requires regular maintenance, like sealing or staining every few years, to prevent splintering and wear.
Calculating the Ideal Ramp Slope for your shed with ramp
Getting the slope right is critical for a functional shed with ramp. The slope is a ratio of rise (the height from the ground to your shed floor) to run (the horizontal length of the ramp).
- For general use (wheelbarrows, push mowers), a 1:8 ratio is ideal. This means for every 1 inch of rise, you need 8 inches of run.
- For heavy equipment (riding mowers, ATVs), a steeper 1:6 or 1:4 ratio may be needed to keep the ramp from being too long.
To calculate your ramp’s length, first measure the rise. For example, if your shed floor is 12 inches high (the rise), a 1:8 slope requires a 96-inch (8-foot) ramp (12 x 8 = 96). A 1:6 slope would require a 72-inch (6-foot) ramp. From our decades of experience, we know a gradual incline is always safer and easier to use.
Sizing for Heavy Equipment vs. Foot Traffic
The size and strength of your ramp must match its intended use.
- Width: Your ramp should be at least as wide as your shed door, if not slightly wider, to allow for easy clearance and prevent rolling off the edge.
- Heavy Loads (Riding Mowers, ATVs): For heavy equipment, the structure needs reinforcement. Space support joists closer together (16 inches on center is standard, 12 inches for extreme weight). Use thicker decking, like 2×6 lumber or ¾-inch plywood, to distribute weight and prevent bouncing.
- Light Loads (Foot Traffic, Push Mowers): For lighter use, these structural requirements can be relaxed, but a non-slip surface is still crucial for safety.
Whether buying or building, ensure your ramp’s weight capacity is sufficient for your heaviest equipment. At Wright’s Shed Co., we build our sheds onsite with durability in mind, and we can advise on a ramp design that will work perfectly for years to come.
How to Build a Durable Wooden Shed Ramp
Building your own wooden shed with ramp is a satisfying and budget-friendly project. The key to a long-lasting ramp is using pressure-treated lumber for all components exposed to weather and quality, exterior-grade galvanized hardware to prevent rust. A well-built ramp should complement your shed’s quality, not undermine it.
For a comprehensive walkthrough, see our guide on How to Build a Storage Shed Ramp.
Tools and Materials Checklist
Gathering your tools and materials beforehand will ensure your project goes smoothly.
Tools:
- Circular saw or miter saw
- Cordless drill with driver bits
- 4-foot level
- Tape measure and speed square
- Shovel
- Safety glasses and work gloves
For more on essential tools, this resource is a helpful guide.
Materials:
- Lumber: Pressure-treated 2x6s (for joists and decking) and 4x4s or 6x6s (for foundation supports). Ensure any wood touching the ground is rated for ground contact.
- Ledger Board: A pressure-treated 2×4 or 2×6 to anchor the ramp to the shed.
- Hardware: Galvanized 3-inch deck screws and 3-inch lag bolts.
- Base: Gravel or crushed stone for a stable, well-draining base.
- Finishing: Outdoor wood sealer/stain and optional non-slip grip tape.
Step-by-Step Construction Guide for your shed with ramp
Building a solid wooden shed with ramp involves six key stages.
Step 1: Attach the Ledger Board
The ledger board anchors the ramp. Cut a pressure-treated 2×4 or 2×6 to your door’s width. Position it just below the shed threshold (leave a small gap for drainage), ensure it’s level, and secure it to the shed’s sill plate with 3-inch lag bolts.
Step 2: Prepare the Ground and Foundation
Mark the ramp’s footprint. Excavate shallow trenches for the joists and a level area at the base. For better stability and drainage, add and compact a few inches of gravel. For a large height difference, you may need a small landing frame at the base.
Step 3: Cut and Install the Ramp Joists
Joists are the ramp’s backbone. Calculate their length based on your rise and desired slope (e.g., 12-inch rise at a 1:6 ratio needs 72-inch joists). Cut pressure-treated 2x6s to length, angling the top end to sit flush against the ledger. Space joists 16-24 inches apart and secure them to the ledger with galvanized screws or joist hangers.
Step 4: Add the End Piece and Check for Level
Attach a pressure-treated 2×6 across the bottom ends of the joists to keep the frame square. Use your level to check the ramp’s alignment both width-wise and length-wise. Adjust the ground or use shims as needed until it’s perfect.
Step 5: Attach the Decking Boards
Cut 2×6 decking boards to the ramp’s width. Starting at the top, attach the boards to the joists with galvanized deck screws. Leave a ¼-inch gap between boards for drainage and wood expansion.
Step 6: Add Finishing Touches
For a professional finish, bevel the edge of the last board for a smooth transition. Apply an outdoor wood sealer or stain to protect the wood from weather. For safety, especially in wet climates, add non-slip grip tape or textured paint. These details make your shed with ramp safer and longer-lasting. For more visual instructions, Family Handyman’s guide is a great resource.
Why a Custom-Built Ramp is the Ideal Choice
When adding a shed with ramp, a custom-built wooden ramp is the best way to ensure a perfect fit and long-term durability. Unlike pre-made kits that come in fixed sizes, a DIY ramp gives you complete control over the design.
- Pros of a Custom-Built Ramp: You get a perfect fit, custom-tailored to your shed’s door width, ground slope, and aesthetic. You can reinforce the structure for any weight, ensuring maximum durability for heavy equipment like riding mowers. A wooden ramp can also be stained to match your shed for a cohesive, high-quality look.
- Cons of a Custom-Built Ramp: This route requires more time, tools, and basic carpentry skills than a simple kit might.
At Wright’s Shed Co., we don’t build ramps, but we provide expert advice on designing one that integrates seamlessly with our custom sheds, which are always built onsite. A custom ramp, like an attractive Paver Shed Ramp, complements the quality of your shed and ensures a solution that will serve you for decades.
Frequently Asked Questions about Shed with Ramps
Over our years of building custom sheds across Utah, Idaho, Iowa, and Nebraska, we’ve heard many questions about shed with ramp solutions. Here are the most common ones.
What is the best material for a shed ramp?
Pressure-treated wood is the best all-around choice. It is affordable, highly customizable for DIY projects, and can be stained to match your shed. Its durability and resistance to rot make it ideal for an outdoor structure.
How much does a shed ramp cost?
Costs vary depending on the size and design of your ramp. A DIY wooden ramp is a budget-friendly option, as you only pay for lumber and hardware. The final cost will depend on the ramp’s length, width, and the price of materials in your area.
How steep should a shed ramp be?
For general use, a gentle 1:8 slope (1-inch rise per 8 inches of length) is ideal. For heavy riding equipment, a steeper 1:6 or 1:4 ratio may be necessary to keep the ramp length manageable, but a gentler slope is always safer.
How do I maintain my shed ramp?
Wooden ramps require the most upkeep but will last for years with proper care. Check them annually for any loose boards or screws, and re-stain or seal the wood every few years to protect it from the elements and prevent splintering.
Get the Perfect Shed with Ramp for Your Property
A well-designed shed with ramp is a game-changer, changing a back-straining chore into an effortless task. As we’ve seen over 27 years in business, a proper ramp means you’ll use your shed more often and more safely.
Success comes down to planning. By considering equipment weight, slope, and the right materials, you can create a ramp that lasts for decades. Whether you DIY or buy a kit, the benefits of smooth access are undeniable.
For the best result, start with a high-quality shed. At Wright’s Shed Co., we’ve built durable, custom sheds onsite across Utah, Idaho, Iowa, and Nebraska since 1997. Our sheds are custom-fitted to your property and backed by warranties.
Ready to design the perfect storage solution for your property? Contact our Nebraska team to design your perfect shed today, and let’s make storing your equipment easier than ever.


