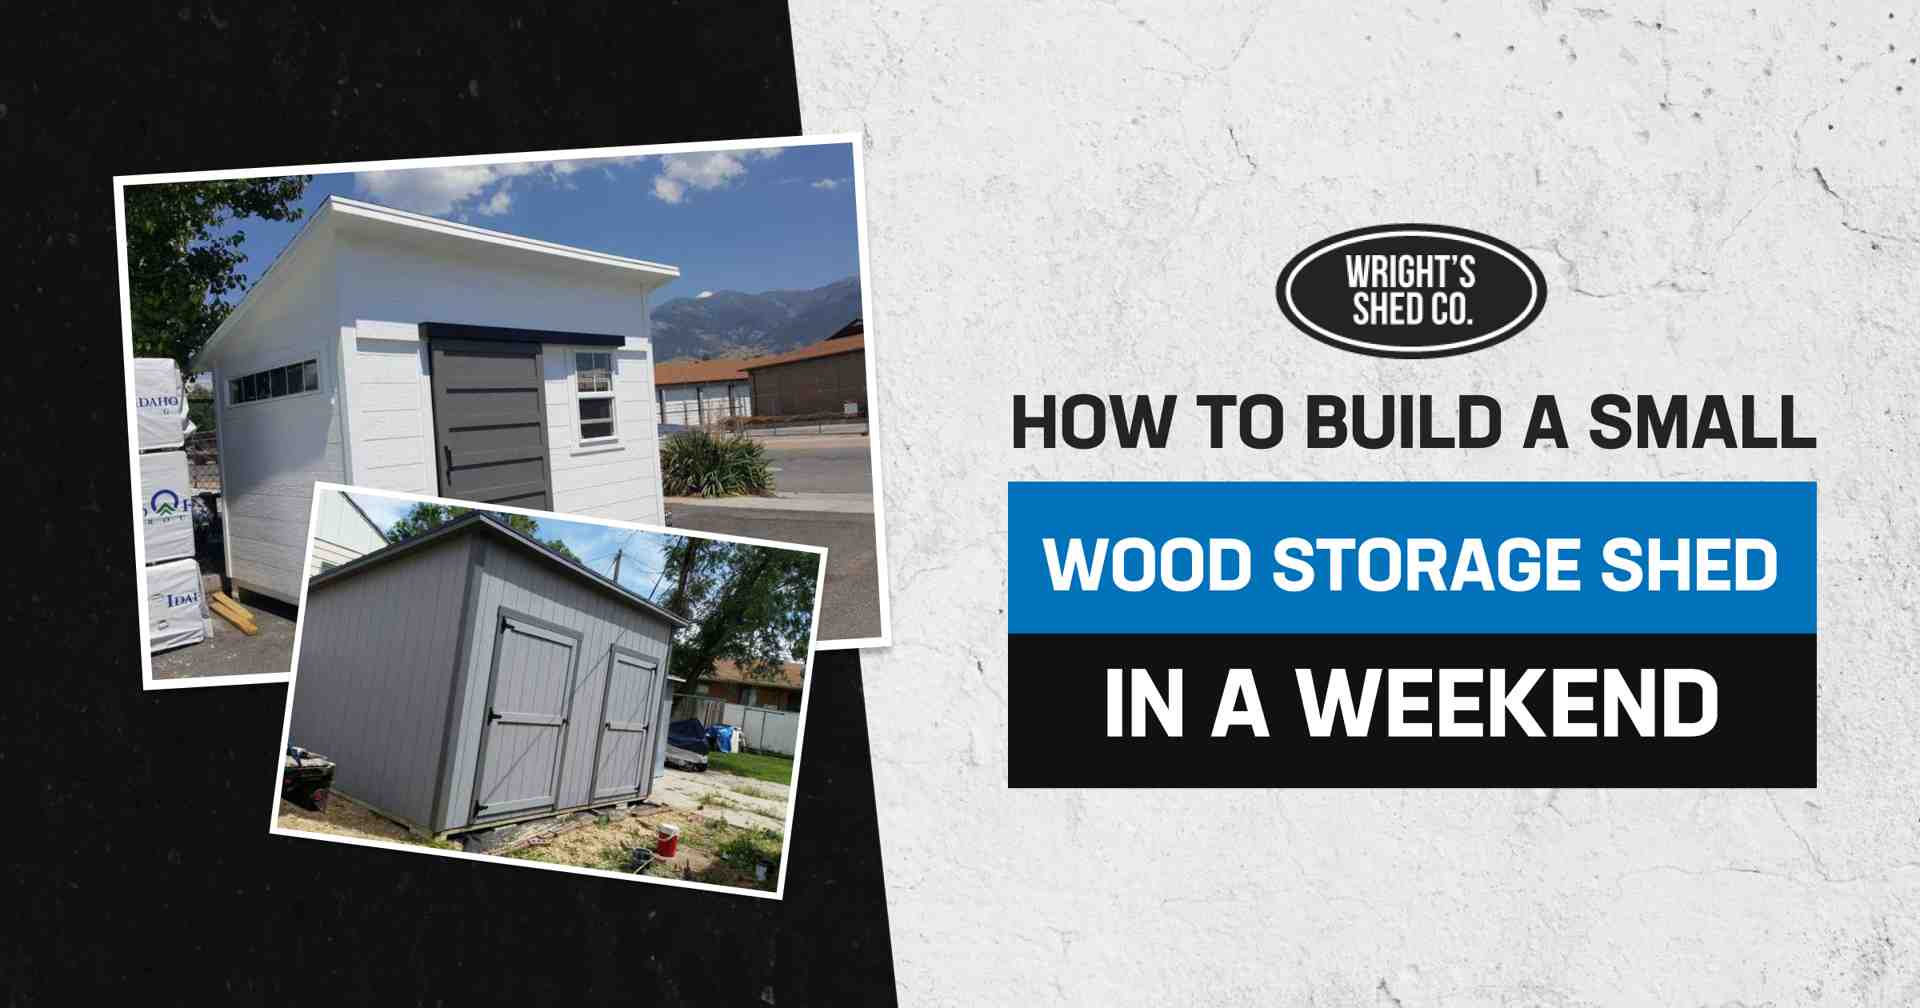
Smart Choice: How to Build a Small Wood Storage Shed
How to build a small wood storage shed is simpler than most homeowners think, and can be completed in just one weekend with the right planning and materials. Here’s the quick overview:
Essential Steps on How to Build a Small Wood Storage Shed:
- Plan and prepare: Choose a location, gather materials (pressure-treated lumber, concrete blocks, screws, roofing).
- Build foundation: Level ground, place deck blocks, construct floor frame.
- Frame walls: Assemble wall frames, create door openings, raise and brace walls.
- Install roof: Cut and attach rafters, add sheathing and weatherproofing.
- Finish exterior: Install siding with proper gaps for airflow.
Building a shed yourself can save you up to $500 compared to hiring a contractor, while giving you complete control over the design and materials. Whether you need storage for firewood, garden tools, or outdoor equipment, a well-built wooden shed provides decades of reliable service when constructed with quality materials and proper techniques.
The key to success lies in thorough preparation and understanding each step before you begin. From selecting the right location with proper drainage to ensuring your foundation is level and square, attention to detail during construction determines how long your shed will last.
Planning Your Shed: Location, Permits, and Materials
Success with how to build a small wood storage shed starts with proper planning. Rushing into a build without thinking through the details often leads to frustration, while taking the time to plan ensures the most satisfying result.
Choosing the Perfect Spot
Finding the right location for your shed needs to be practical, accessible, and safe from the elements.
Level ground makes your life much easier. Look for an area that is naturally close to level. If your yard slopes significantly, you can use concrete piers or deck blocks to create a stable, level foundation.
Good drainage is critical. Water is wood’s biggest enemy, so ensure it flows away from your shed, not pooling around it. Avoid low spots where water collects to prevent rot.
Consider accessibility. You’ll want easy access for storing items like firewood or garden tools. Also, ensure you have enough space to work during construction.
Property lines are important. Most areas require setbacks from boundaries. Also, check for overhead power lines and underground utilities. Call your local utility marking service before digging.
For sunlight exposure, a little sun helps keep your shed dry. For a firewood shed, good sun and air circulation are essential for seasoning wood, as wet wood burns poorly and creates dangerous creosote.
Essential Tools and Materials for a Small Wood Storage Shed
Having the right tools and materials is key to a smooth, enjoyable shed-building project. Here’s what you’ll need:
Power Tools:
- Circular saw or miter saw for precise cuts
- Cordless drill for driving screws
- 4-foot (or longer) level to keep everything plumb and square
Hand Tools:
- 25-foot measuring tape
- Hammer
- Speed square for accurate angles
- Utility knife (especially for roofing)
- Spade and tamper for ground prep
Pressure-treated lumber is non-negotiable for any part touching the ground, like the base frame and floor joists (2x6s or 2x8s). Use 2x4s for wall framing and rafters. The extra cost is worth the longevity.
For sheathing, use plywood or OSB for floors and the roof. Use exterior-grade screws (3-inch deck screws) for strong connections. For heavy-duty firewood sheds, consider carriage bolts for key joints.
You’ll also need foundation materials like concrete deck blocks, roofing supplies (felt paper, shingles or metal panels), and siding of your choice.
Do You Need a Building Permit?
Permit requirements vary by location, and ignoring them can cause major headaches.
Many areas exempt small sheds (often under 120 square feet) from permits. However, “no permit required” doesn’t mean “no rules apply.” You still must follow setback requirements, height restrictions, and other local guidelines.
Your Homeowner association (HOA) may have its own rules about size, style, color, or placement, even if the city doesn’t require a permit.
The smartest approach is to call your local building department before you start. A quick call to ask about permit requirements and zoning restrictions can save you from having to tear down and rebuild.
Trust me, it’s much easier to follow the rules from the start than to deal with code enforcement officers after your shed is already built.
Step-by-Step Guide: How to Build a Small Wood Storage Shed
Now for the exciting part: the build. Building a small wood storage shed is straightforward when broken into manageable steps. The key is to take your time, measure carefully, and prioritize safety. Let’s get started with a simple design perfect for a weekend project.
Step 1: Building a Solid Foundation and Floor Frame
A solid foundation is a crucial first step that ensures the stability and longevity of your shed.
Start by leveling your ground. Mark your shed’s footprint, remove dirt from high spots with a spade, and pack the area with a tamper. Aim to get the ground within about 6 inches of level.
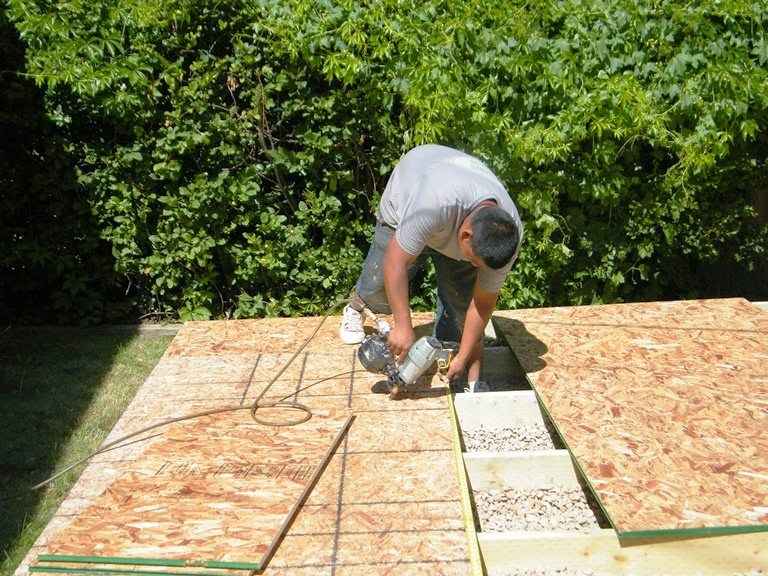
Position your concrete deck blocks in a grid pattern, about 4 to 6 feet apart. Use a long level to ensure each block is level with its neighbors. Placing crushed stone under each block helps with drainage and fine-tuning.
Build your perimeter frame with pressure-treated 2x6s or 2x8s. This rectangular frame is the foundation, so take your time. Secure the corners with exterior-grade screws.
Install your floor joists, spacing them 16 inches on-center for solid support. Use joist hangers for stronger connections than toenailing.
Square your frame by measuring diagonally from corner to corner. The frame is square when both measurements match exactly. Adjust the frame until they do.
Attach your floor sheathing using 3/4-inch plywood or OSB. Stagger the seams for strength and secure with exterior-grade screws every 8 to 12 inches into the joists and frame.
Step 2: Framing the Walls and Adding Supports
Building wall frames on the ground first is easier and safer.
Assemble each wall frame on the floor. Cut 2x4s for your top plates, bottom plates, and vertical studs. Space studs 16 inches on-center for strength. Use pressure-treated lumber for the bottom plates.
Create a sloped roof by making the back wall 6 to 12 inches shorter than the front wall. This simple lean-to design is great for beginners and effectively sheds water.
Frame your door opening in the front wall with vertical jack studs and a horizontal header. If using a pre-made door, double-check the required rough opening dimensions to ensure it fits.
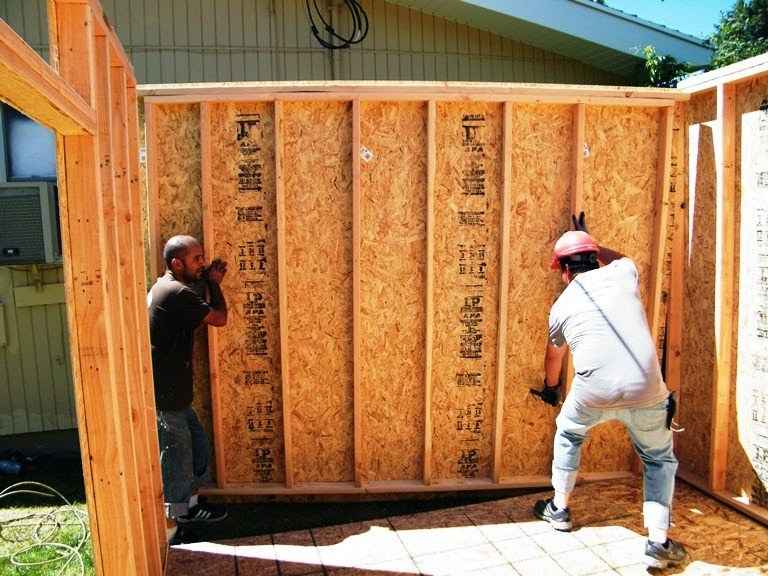
Lift and brace your walls one at a time with a helper. Secure the bottom plate to the floor frame and use temporary diagonal braces to keep walls plumb. Once all walls are up, connect the top plates at the corners.
Step 3: Constructing and Attaching the Roof
A well-built roof will protect your belongings for decades.
Cut your rafters from 2x4s to run from the tall front wall to the shorter back wall. Carefully cut the bird’s mouth notches where each rafter sits on the top plate to ensure a flush, secure fit.
Attach the rafters, spacing them 16 or 24 inches on-center. Ensure they extend beyond the front and back walls to create protective overhangs that keep rain off the siding.
Install blocking (short 2×4 pieces) between rafters to prevent twisting and add rigidity to the roof structure.
Attach your roof sheathing (1/2-inch or 5/8-inch plywood or OSB), staggering the joints as you did with the floor. Ensure the sheathing covers the overhangs completely.
Step 4: Weatherproofing the Roof and Adding Siding
This final construction step transforms your frame into a weather-tight storage solution.
Install drip edge along the roof’s lower edges first. This aluminum flashing is crucial for directing water away from the fascia. Overlap long runs by about an inch.
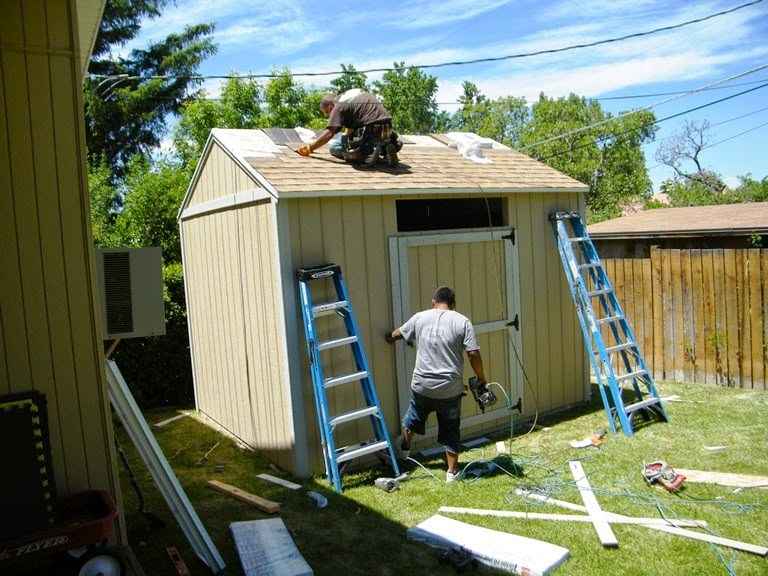
Roll out roofing felt from the bottom edge upward, overlapping each row by at least 3-4 inches to shed water. Secure it with roofing nails or heavy-duty staples.
Install your final roofing material, like asphalt shingles or metal panels. For shingles, use a starter course and overlap subsequent rows, offsetting each by 6 inches. Metal panels are a faster, durable option for a simple shed.
For additional guidance on construction techniques, the EPA has created this helpful resource: How to Build a Firewood Storage Shed Video.
Add your siding. For general storage, install it tightly. For a firewood shed, leave 1/2- to 1-inch gaps between slats on the sides and back for airflow. Many firewood sheds also have open fronts for maximum circulation.
Apply your final finish. Seal gaps with exterior caulk and apply high-quality paint or stain. This protective layer shields the wood from UV rays and moisture, extending the shed’s life and improving its appearance.
Finishing Touches and Smart Improvements
With the main structure built, it’s time for the satisfying part: finishing touches. These steps transform your basic shed into a customized storage solution that will serve you for decades.
Common Mistakes to Avoid When Building Your Shed
Most DIY shed building mistakes are easily preventable once you know what to watch for.
Inadequate foundation. Skipping the leveling process or choosing unstable ground leads to issues like doors that won’t close, bowed walls, and a wobbly structure. Take the time to build a solid foundation.
Not squaring the frame. An out-of-square frame causes problems with walls and roofing, turning the build into a frustrating puzzle. Use diagonal measurements to ensure the frame is perfectly square.
Ignoring local codes. Failing to check local requirements can lead to being forced to tear down your shed. A quick call to your building department can prevent major headaches.
Poor weatherproofing. Skipping roofing felt, using untreated lumber in key areas, or leaving unintentional gaps in siding invites moisture. Ensure your shed is properly sealed to keep its contents dry.
For firewood storage, insufficient ventilation is a critical mistake. A sealed shed creates mold. Wood needs airflow to season properly, as wet firewood burns poorly and creates dangerous creosote.
How to Customize Your Small Wood Storage Shed
Building your own shed means you can make it work exactly how you want it to.
Adding shelves is a popular upgrade. Simple 2×4 and plywood shelves mounted to the wall studs can double your storage capacity and help organize smaller items.
Building a ramp from pressure-treated lumber makes it easy to store wheeled equipment like mowers or wheelbarrows without lifting.
Painting or staining protects the wood from UV damage and moisture while improving its appearance. Choose a quality exterior paint or stain that complements your home.
Adding a door provides security and weather protection for general storage. You can build a simple door or use a pre-fabricated one. Firewood sheds often have an open front for airflow.
The basic principles of learning how to build a small wood storage shed scale up or down perfectly, whether you need a compact 4×4 unit or a larger 8×12 shed.
Recommended Upgrades for Longevity
These upgrades cost a little more upfront but will save you money and hassle down the road.
Extending roof overhangs by at least a foot on all sides is one of the best upgrades for longevity. It dramatically improves weather protection by keeping rain off the siding and foundation. As this EPA resource notes, better protecting your wood from the elements by extending the shed roof makes a huge difference.
Using stronger 2x4s for slats provides better structural integrity, especially for firewood sheds holding heavy logs. Depending on lumber prices, 2x4s can be more economical than thinner boards.
Using carriage bolts instead of lag screws for key, load-bearing connections creates stronger, longer-lasting joints. They resist loosening over time, providing extra peace of mind.
These are the same techniques we use in our professional builds at Wright’s Shed Co. to ensure every project is built right the first time.
Frequently Asked Questions about How to Build a Small Wood Storage Shed
Here are answers to the most common questions about learning how to build a small wood storage shed.
What is the best wood to use for a small shed?
The best wood depends on the part of the shed and your budget.
Pressure-treated lumber is essential for any component touching the ground or exposed to heavy rain, such as foundation beams, floor joists, and bottom plates. This protects against rot and insects. Do not skip this step.
For wall studs and roof rafters, standard construction-grade pine or spruce is sufficient, as these parts stay drier.
For floor and roof sheathing, use exterior-grade plywood or OSB. Interior-grade plywood will delaminate when exposed to moisture.
For siding, you have several choices: Plywood siding (T-111) is cost-effective and installs quickly. Cedar is beautiful and naturally rot-resistant but costs more. Pine offers a classic look at a good price. Engineered products like LP SmartSide cost more but often include long warranties.
How do you ensure a shed has proper airflow for storing firewood?
Proper ventilation is crucial for a firewood shed to prevent seasoned wood from becoming damp. Here’s how to ensure good airflow:
Lift the floor off the ground. Using concrete blocks creates an air gap underneath, preventing ground moisture from wicking up into your firewood.
Leave gaps between siding boards. A 1/2- to 1-inch gap between boards on the sides and back creates natural ventilation, allowing air to flow through the woodpile.
Consider a completely open front. Maximum airflow is more important than protection from occasional rain. The roof protects from heavy weather, while the open front allows sun and wind to dry the wood.
Pro tip: Avoid using plastic tarps inside the shed. They trap moisture and promote mold. The roof provides all the necessary overhead protection.
Can I really build a shed in one weekend?
Yes, for a simple design like a lean-to or firewood shed, a weekend build is realistic.
Success depends on preparation. Have materials cut, tools organized, and the site prepped beforehand to avoid delays.
Your skill level affects the timeline. Experienced builders will be faster, but beginners can complete this project, though it may take the full weekend.
Keep the design simple. A basic lean-to or three-sided firewood shed is ideal for a weekend build. Save complex features for a future project.
Having a helper is invaluable for lifting walls, holding boards, and keeping the project moving safely and efficiently.
The main structure (foundation, walls, roof) can be built in a weekend. Finishing touches like paint or shelves can be done later, but you’ll have a functional shed by Sunday.
How to Build a Small Wood Storage Shed: DIY Pride or Wright’s Shed Co. Expertise
We’ve now covered every step of how to build a small wood storage shed, from planning and gathering materials to framing, roofing, and finishing.
Beyond the money you save (up to $500 compared to hiring a contractor), there’s deep satisfaction in building something with your own hands. You’ll feel a surge of pride each time you use the shed you built.
Building your own shed gives you complete control over the design, materials, and features, from ventilation and shelving to the final paint color.
The skills you learn, measuring, framing, and roofing, are transferable to other home improvement projects, giving you confidence to tackle more.
Of course, a DIY project isn’t for everyone. You may lack the time or tools, or perhaps your project requires a more complex foundation or features like custom windows and electrical wiring.
That’s where we come in. Since 1997, Wright’s Shed Co. has crafted high-quality custom storage solutions in Utah, Idaho, Iowa, and Nebraska, applying professional expertise to every build.
Our custom sheds include upgraded features as standard, like stronger foundations and extended roof overhangs, to ensure your investment lasts. We back our craftsmanship with warranties.
Whether you build it yourself or call us, the goal is getting the storage you need. Your yard will be more organized, your equipment protected, and you’ll have solved a problem the right way.
If you’re ready to explore your options, check out our shed pricing page for a clear breakdown of costs and features. It’s the easiest way to compare sizes, styles, and upgrades so you can decide whether to build your own or let Wright’s Shed Co. craft a custom small wood storage shed that’s built to last.


