Why Pre-cut Shed Kits Are the Smart Choice for DIY Storage
Pre-cut shed kits offer the perfect balance of convenience, quality, and affordability for homeowners looking to add storage space without the complexity of building from scratch. These kits come with all materials precisely cut, labeled, and ready for assembly – eliminating the guesswork and reducing construction time from weeks to just a weekend.
What makes pre-cut shed kits ideal for your backyard project:
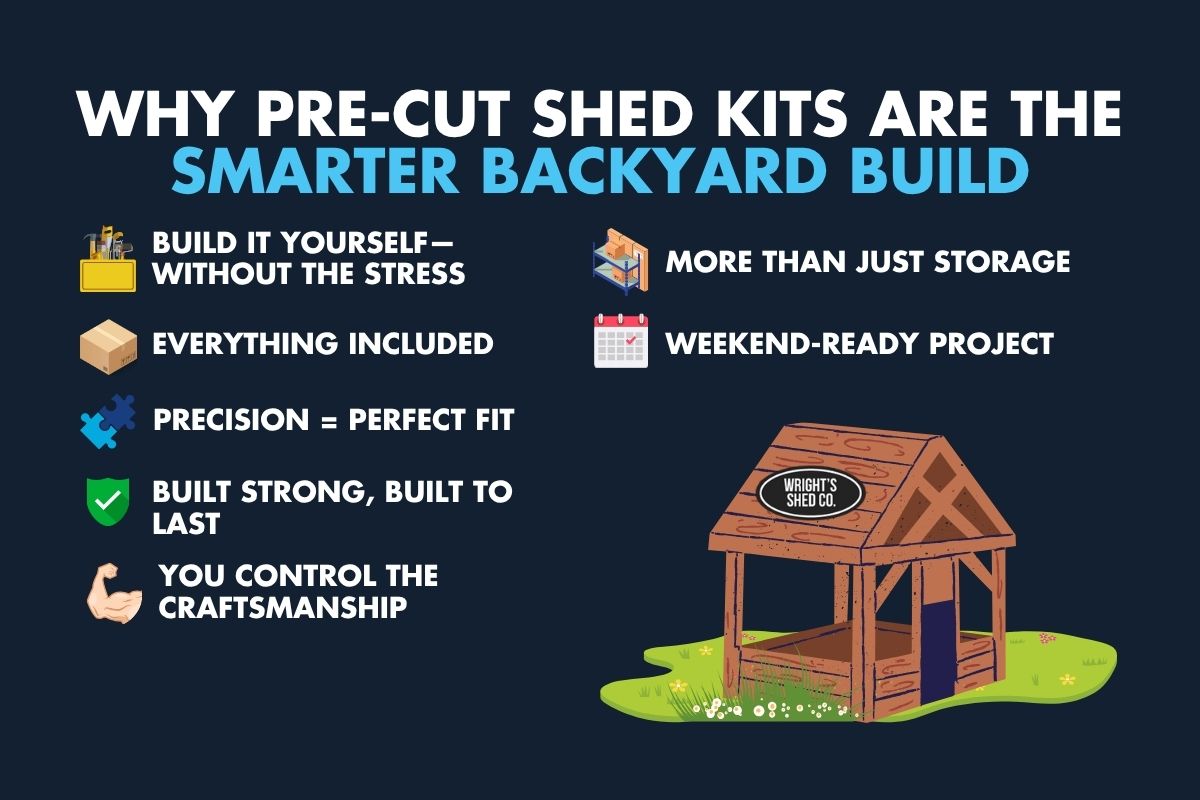
- All components included: Floor, walls, trusses, doors, trim, roofing materials, and hardware.
- Precision-cut materials: No measuring, cutting, or multiple hardware store trips required.
- Easy assembly: Pre-built walls and trusses with step-by-step instructions.
- Cost-effective: Typically 20% less expensive than hiring contractors.
- Customizable: Choose your paint, shingles, windows, and door placement.
- Quality materials: Made with premium lumber.
The appeal is clear: you get the satisfaction of building it yourself while avoiding the headaches of planning, measuring, and sourcing materials.
Why Choose Pre-cut Shed Kits for Your Backyard?
There’s something deeply satisfying about building something with your own hands. When you choose pre-cut shed kits for your backyard project, you’re not just getting a storage solution – you’re starting on a rewarding DIY trip that brings real benefits to your property and your sense of accomplishment.
The beauty of these kits lies in the control over quality they give you. Unlike purchasing a pre-built shed where you have to trust someone else’s workmanship, you get to inspect every board, nail, and component as you build. This hands-on approach means you know exactly how well your shed is constructed because you’re the one putting it together.
That sense of accomplishment when you step back and admire your finished shed? It’s genuinely rewarding. You built that. And because you used quality materials and followed proper construction techniques, you’ve created something with real durability and longevity.
Pre-cut shed kits offer incredible versatility in how you’ll use your finished structure. It might start as a storage solution for your lawnmower and garden tools, but many customers transform theirs into so much more. That same shed could become a dedicated workshop space where you pursue woodworking or crafts, a charming playhouse for the kids, or a specialized garden shed for all your green-thumb supplies and potting needs.
If you’re weighing different approaches to getting your perfect shed, our guide Custom or Pre-Built Shed: Which Should You Choose? can help you think through the options.
The Advantages Over Building from Scratch
Building a shed from scratch sounds appealing until you realize what it actually involves. Months of planning, endless trips to the hardware store, and trying to decipher complex blueprints can turn your dream project into a nightmare. Pre-cut shed kits eliminate these headaches entirely.
With our kits, you don’t need complex plans – everything comes with clear, step-by-step instructions that make sense. The precision-cut components fit together perfectly because they were cut by professionals using exact measurements, not eyeballed in your driveway with a circular saw.
This precision also means reduced waste. You won’t end up with a pile of leftover lumber or find you cut something wrong and need to make another hardware store run.
The time savings are significant. What might take weeks of planning and cutting becomes a manageable weekend project. You get professional results without needing professional skills, and you save significant time that you can spend enjoying your new shed instead of struggling to build it.
How They Compare to Other Shed Solutions
When you compare pre-cut shed kits to other options, the advantages become clear. They cost significantly less than hiring contractors – often about 20% less than custom builds. But the savings go beyond just the lower cost.
Pre-built sheds face real limitations that kits don’t. Transportation restrictions mean pre-built sheds can’t be too tall or wide, and they need clear access to your chosen spot. If you have a tight backyard or landscaping in the way, delivery becomes complicated or impossible.
Pre-cut shed kits solve these access issues completely. The materials arrive in a compact package that fits anywhere a delivery truck can go. You then build the shed exactly where you want it, giving you built-on-site flexibility that pre-built options simply can’t match.
This approach also offers customizable placement – you’re not limited by what can be maneuvered into your backyard. Want your shed in that perfect corner spot behind the garden? No problem. Need it tucked between existing trees? Easy.
The result is a structure that meets your exact needs, built to your standards, in precisely the right location. For more insights on what makes a truly excellent shed, check out our guide on 5 Signs of a High-Quality Shed.
Selecting the Perfect Shed Kit for Your Needs
Finding the right pre-cut shed kit is like finding the perfect pair of jeans – it needs to fit your space, match your style, and make you feel good every time you see it. The key is thinking beyond just “I need storage” and considering how this shed will live in your backyard for years to come.
Matching your home’s aesthetic should be your starting point. If you’ve got a charming farmhouse, a sleek modern ranch-style shed might look as out of place as sneakers with a tuxedo. The goal is harmony – your new shed should feel like it was always meant to be part of your property.
But before you fall in love with any particular style, take a moment to consider local building codes. I know, I know – paperwork isn’t nearly as fun as picking out paint colors. But trust me, checking permit requirements early saves headaches later. Some areas have size restrictions, setback requirements, or foundation specifications that could impact your choice. A quick call to your local building department now beats a surprise visit from the code enforcement officer later.
For inspiration and ideas on how different styles can transform your backyard, explore our guide on Shed Styles: Exploring Unique, Versatile Options.
Choosing Your Material and Style
The material you choose for your pre-cut shed kit is like choosing the foundation of a relationship – it’s going to determine how well things hold up over time. Most of our kits feature high-quality wood that’s been selected for both beauty and durability.
Western Red Cedar is one of our premium options, and honestly, it’s hard to beat. This material brings that classic hardwood appearance with natural resistance to decay and insects built right in. Plus, there’s something special about that fresh cedar scent when you’re working in your shed on a warm afternoon. It’s environmentally friendly and develops a beautiful weathered look over time.
For those wanting maximum durability, LP SmartSide exterior paneling is a game-changer. Made from wood strands pressed into a resin-saturated substrate, it offers superior strength and comes with an impressive 50-year limited warranty. Many of these panels come pre-primed, which means you’re halfway to your custom paint job before you even start.
When it comes to roofing, you’re not stuck with basic shingles. Metal roofing systems using 26-gauge corrugated metal can last 40-70 years. That’s potentially the last roof your shed will ever need – now that’s what I call a solid investment.
Style-wise, each option brings its own personality. Barn-style sheds with their iconic gambrel roofs maximize headroom and scream “classic Americana.” Ranch-style designs offer clean lines that complement modern homes beautifully. Lean-to styles are perfect when you need to tuck your shed into a tight space or against an existing structure.
Want to dive deeper into your options? Check out 3 Shed Styles to Consider and browse through various Shed Roof Ideas for inspiration.
Sizing and Customizing Your Pre-cut Shed Kits
Getting the size right is crucial – too small and you’ll be playing storage Tetris forever, too large and you’ve got an expensive empty space. We offer everything from compact 6×6 models perfect for basic tool storage up to expansive 12×20 structures that can house vehicles or serve as serious workshops.
Here’s how different sizes typically work in real life:
| Size (W x D) | What Actually Fits |
|---|---|
| 6×6 ft. | Small tools, push mower, seasonal decorations, trash cans |
| 8×10 ft. | Garden tools, bicycles, small riding mower, patio furniture |
| 10×12 ft. | Riding mower, workbench, extensive tool collection |
| 10×16 ft. | ATV, serious workshop setup, bulk storage |
| 12×20 ft. | Large equipment, substantial hobby space, two-story options |
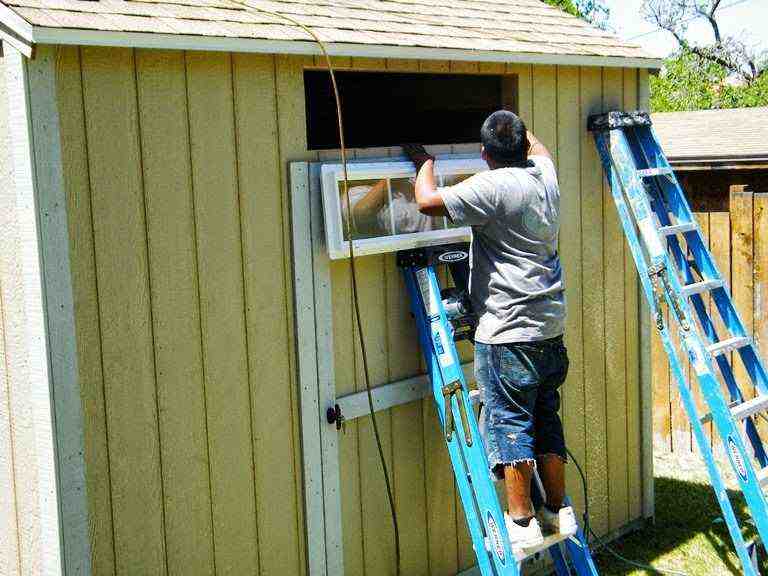
The real magic happens when you start customizing your kit. Think of it as the difference between buying a house and making it a home. Adding windows transforms a dark storage space into a bright, welcoming area – whether you choose fixed windows for light, awning windows for ventilation, or half-awning styles for both.
Door options can completely change how you use your shed. Single doors work fine for basic storage, but double doors make moving lawn tractors and large equipment a breeze. And if you want something with real character, Dutch doors add charm while allowing airflow on nice days.
Don’t forget about vertical space. Loft storage is perfect for seasonal items you only need twice a year. Wall height extensions give you that extra headroom – some options provide 7-foot tall side walls or even 7-foot 3-inch interior clearance. That’s the difference between bumping your head and working comfortably.
The finishing touches are where your personality really shines. Since paint and shingles aren’t typically included, you get complete freedom to match your home’s colors perfectly. It’s like having a blank canvas that’s already built.
Ready to see all these options come together? Our guide on Shed Customization: Is It Worth the Extra Cost? breaks down the value of each upgrade. You can even start visualizing your perfect shed with our Design Your Shed in 3D tool – it’s like having a crystal ball for your backyard!
What to Expect: From Delivery to Assembly
The moment you place your order for a pre-cut shed kit, you’re just days away from starting your exciting building trip! The delivery process is refreshingly straightforward – your materials arrive via curbside delivery, neatly packaged and ready for you to move to your chosen building site.
Your kit will include:
- Pre-built and pre-sheeted 2×4 walls with LP SmartSide paneling.
- Pre-cut 2×6 pressure-treated wood base.
- Pre-cut ¾-inch tongue-and-groove OSB floor sheathing.
- Pre-built roof trusses joined with steel plates.
- Diamond plate metal door threshold.
What makes these kits truly special is the precision behind every component. The floor joists come precut and clearly marked, taking the guesswork out of your foundation. The floor and roof sheeting arrive precut with detailed layout sheets showing you exactly where each piece goes. The wall sections are already framed and sided, ready to stand up with minimal effort on your part. Even most of the trim pieces are pre-cut and marked, so you won’t spend hours measuring and cutting materials.
This level of preparation means you can focus on the satisfying work of assembly rather than getting bogged down in complicated measurements and cuts. It’s what makes our kits The Easiest Storage Shed to Build for homeowners of any skill level.
Tools, Skills, and Site Preparation
Here’s some great news – you don’t need to be a master carpenter to build one of our pre-cut shed kits! These kits are specifically designed with novice builders in mind. If you can swing a hammer and follow step-by-step instructions, you have all the basic carpentry skills needed to create a beautiful, sturdy shed.
The tool requirements are equally manageable. You’ll need to provide:
- Nails or screws
- Framing, siding, and roofing nail guns (or a drill if you don’t have nail guns)
- Shingles
- Roof underlayment
- Drip edge
- Hammer, level, and tape measure
- Circular or reciprocating saw
- Pencil, razor blade or box cutter, drill, and caulk
- Paint for the final finish
Optional but helpful tools: Framing nail gun, roofing nail gun with air compressor, chalk line, pry bar, reciprocating saw.
The foundation preparation is arguably the most important part of your entire project. A proper foundation protects your shed from moisture damage and ensures long-term stability. You have several excellent options depending on your situation and local requirements.
Wright’s Shed Co. does not install foundations, but we will offer recommendations and advice. A proper foundation is essential to protect your shed from moisture and maintain stability.
Common options include:
- Gravel pad – Affordable, simple, and effective.
- Concrete slab – The most permanent and stable option, ideal for heavy use.
- Treated wood base – Included with your kit, featuring 4×4 runners and 2×4 joists topped with ¾-inch plywood flooring.
For detailed guidance on choosing the right foundation for your specific situation, check out our comprehensive resources on Foundations: Types to Use for Your Shed and the Art of Creating Solid Ground Shed Foundation.
The Step-by-Step Assembly Process
Building your pre-cut shed kit follows a logical, satisfying progression that transforms a pile of materials into a beautiful, functional structure. While every kit includes its own detailed instruction manual (which we always recommend following), the general process moves through four main phases.
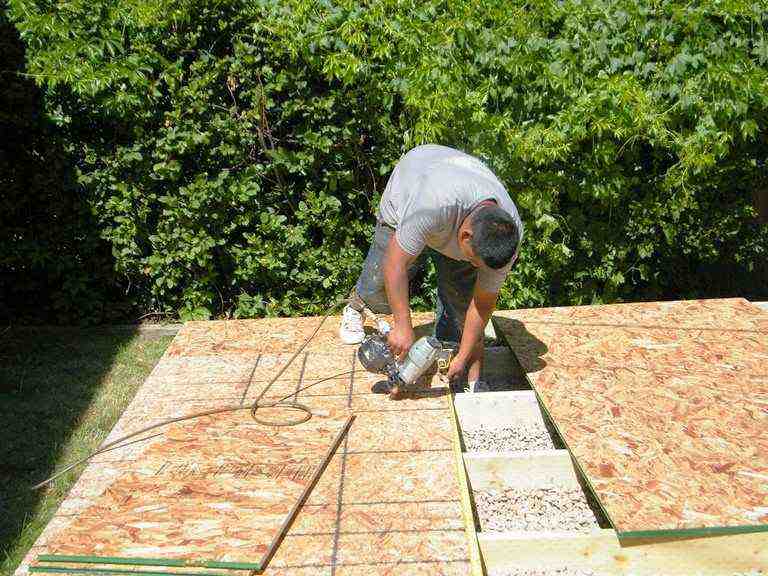
Building the floor frame comes first and sets the stage for everything that follows. The precut and marked floor joists make this step surprisingly straightforward – you’re essentially following a blueprint that’s already been cut for you. Once the frame is assembled, the precut floor sheeting goes down according to the provided layout sheet, creating a solid, level platform for your shed. This foundation work might not be glamorous, but it’s deeply satisfying to see that perfect base take shape. Our DIY Shed Instructions: Base or Floor guide provides additional tips for this crucial first step.
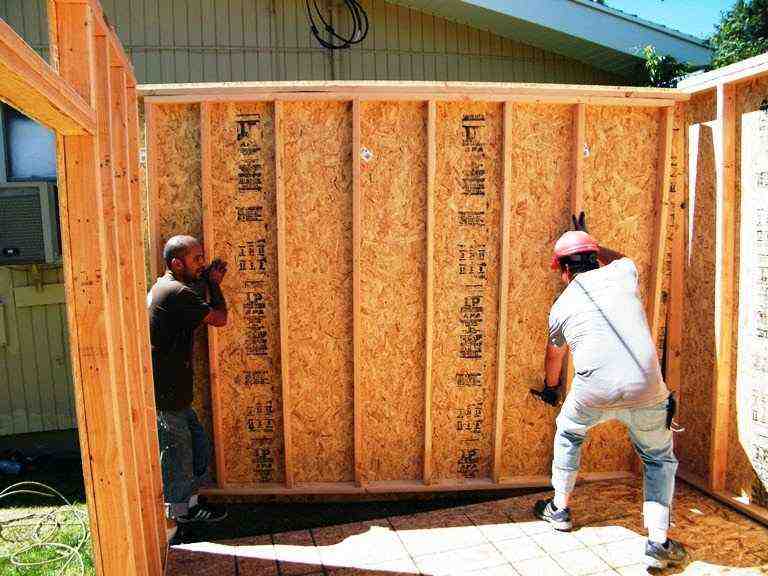
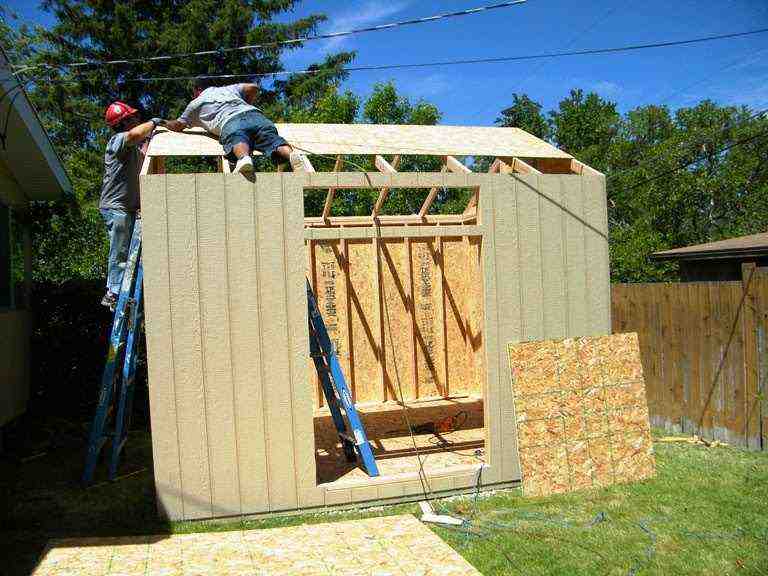
Raising the walls is where your shed truly comes to life! This is the moment that makes all the preparation worthwhile. The wall sections arrive completely framed with siding already attached – they’re literally ready to stand up. With a helper (this is definitely a two-person job), you’ll raise these pre-assembled panels and secure them to your floor frame. It’s incredible how quickly your shed takes shape at this stage. You can learn more about this exciting phase in our DIY Shed Building Steps: Walls guide.
Installing trusses and roofing brings your shed under cover. The pre-built trusses install easily, forming the skeleton of your roof structure. The precut roof sheeting follows, then your weatherproofing materials – underlayment, drip edge, and shingles. This phase requires attention to detail since proper roofing protects your investment for decades to come. Professional techniques for this critical step are covered in How Pros Build Strong Shed Roofs.
Adding trim and doors provides the finishing touches that transform your structure from a basic building into an attractive addition to your property. The trim pieces, mostly pre-cut and marked, install around windows, doors, and corners for that clean, professional appearance. The doors come pre-assembled and ready to hang – you’ll just need to attach the hinges and hardware. Our DIY Shed Building Guide: Trim walks you through these final details.
Throughout this entire process, you’ll appreciate how the precision cutting minimizes your work. Most materials require no cutting at all, with only occasional straight cuts needed for roof sheathing or siding on certain models. For a complete overview of what to expect, you can View a Standard Instruction Manual to see exactly how detailed and user-friendly our instructions are.
Frequently Asked Questions about Pre-cut Shed Kits
We get it – you probably have a few lingering questions before diving into your shed-building trip! After helping thousands of customers over the years, we’ve noticed the same questions come up time and again. Let me address the big ones that are likely on your mind right now.
How long does it take to assemble a pre-cut shed kit?
Here’s the honest answer: it depends on a few key factors, but the news is pretty good! Assembly time varies based on the size of your shed, how many people you have helping, and your general skill level with basic tools.
For smaller pre-cut shed kits like an 8×8 or 10×12, two reasonably handy people can typically knock it out over a weekend. We’re talking Saturday morning to Sunday afternoon, with time for breaks and maybe a barbecue lunch! Larger structures – think 12×20 or bigger – or kits with extra features like lofts might stretch into a second weekend.
Now, some experienced DIYers have surprised us by finishing in just one day, but we always recommend planning for a typical weekend project. Even kits that require a few extra cuts for roofing or siding take dramatically less time than building from scratch, which could drag on for months. The beauty of precision-cut, labeled components is that you spend your time assembling, not measuring and re-measuring!
Are pre-cut shed kits waterproof and durable?
Absolutely! This is where material quality and proper assembly work together to give you a structure that’ll protect your belongings for decades. We build our pre-cut shed kits with heavy-duty construction, featuring real 2×4 framing that provides exceptional strength and stability.
Your kit includes everything needed for a robust, waterproof barrier – roofing materials like underlayment, drip edge, and quality roof sheeting. If you choose metal roofing, you’re looking at an impressive 40-70 year lifespan. Our siding warranties can extend up to 50 years, like the LP SmartSide materials that come with many of our kits.
The key is following the assembly instructions carefully and keeping up with routine maintenance. This means painting any pre-primed surfaces and doing occasional check-ups for wear. Do this, and your pre-cut shed kit will be a reliable, weatherproof guardian for your tools, equipment, and treasures for generations to come.
Do I need a permit to build a shed from a kit?
This is probably our most important FAQ, and the answer is: permit requirements vary significantly depending on where you live. What flies under the radar in one town might require a full permit application in the next town over.
Several factors typically influence whether you need permits: size restrictions often set limits like 100, 120, or 200 square feet before permits kick in. Taller structures, especially with lofts, are more likely to need approval. Foundation type matters too – permanent concrete foundations usually require permits while gravel pads or treated wood foundations might not.
Your intended use makes a difference as well. Basic storage? Probably fine. Workshop with electricity? That’s permit territory. Distance from property lines also factors into local regulations.
Our strongest advice? Check local regulations with your zoning and building department before you order. A quick phone call can save you headaches later and ensure your beautiful new shed stays exactly where you built it. Most folks find the requirements pretty reasonable, and it’s always better to know upfront than get surprised later!
The Lasting Value of Pre-Cut Shed Kits
When you step back and look at everything we’ve covered, it’s clear that pre-cut shed kits represent something pretty special in home improvement. They’re not just another storage solution – they’re your ticket to a rewarding weekend project that delivers lasting value for years to come.
The cost savings alone make these kits compelling. You’re looking at significant savings compared to hiring contractors or buying fully assembled sheds, often around 20% less than custom builds. But honestly, the real magic happens when you consider everything else you’re getting: complete control over quality, the deep satisfaction that comes from building something with your own hands, and the ability to customize every detail to match your vision.
Think about it – where else can you get a storage solution that’s also a workshop, a playhouse, a she-shed, or even a cozy retreat space? The customization options are what really set these kits apart. Whether you’re choosing the perfect paint color to complement your home, adding windows for natural light, or selecting the ideal door configuration for your needs, you’re creating something uniquely yours.
At Wright’s Shed Co., we’ve been perfecting this approach since 1997. We understand that quality matters when you’re investing your time and money into a project. That’s why our high-quality materials come with industry-leading warranties – up to 50 years on some components. We serve homeowners across Utah, Idaho, Iowa, and Nebraska with the same commitment to excellence that’s kept us going strong for over 25 years.
The beauty of choosing a pre-cut shed kit is that you get the best of all worlds. You avoid the headaches of building from scratch while still enjoying that incredible sense of accomplishment when you step back and admire your finished shed. No complex planning, no multiple trips to the hardware store, no wondering if you measured correctly – just quality components that fit together perfectly.
Ready to start your project? Our comprehensive Shed Kit Guide walks you through everything you need to know, from choosing the right size to understanding local permit requirements. You can also browse our complete selection of DIY Shed Building Kits to find the perfect match for your backyard and your needs.
Your perfect storage solution is waiting – and it’s probably easier to achieve than you think.

